Table of Contents
This guide covers all the content related to Hollow Zero in-depth and aimed for people who want to know all the in’s and out’s of this game mode.
If you want basic information related to this game mode, please refer to our starter guide.
Disclaimer:
- This guide won’t contain any meta related content.
- This guide isn’t an achievement Hollow Zero guide as many of them are locked behind RNG, specific actions or obtained through repetition.
Requirements:
- Requires Inter-knot Level 10
- Progress on the Main Story: After Chapter 1 Interlude completion.
- Complete a side quest that grants access to the Scott Outpost.
What is Hollow Zero?
It’s a rogue-lite gamemode where you explore a hollow based on a zone; each one containing a different boss and various floors/difficulties and rewards.
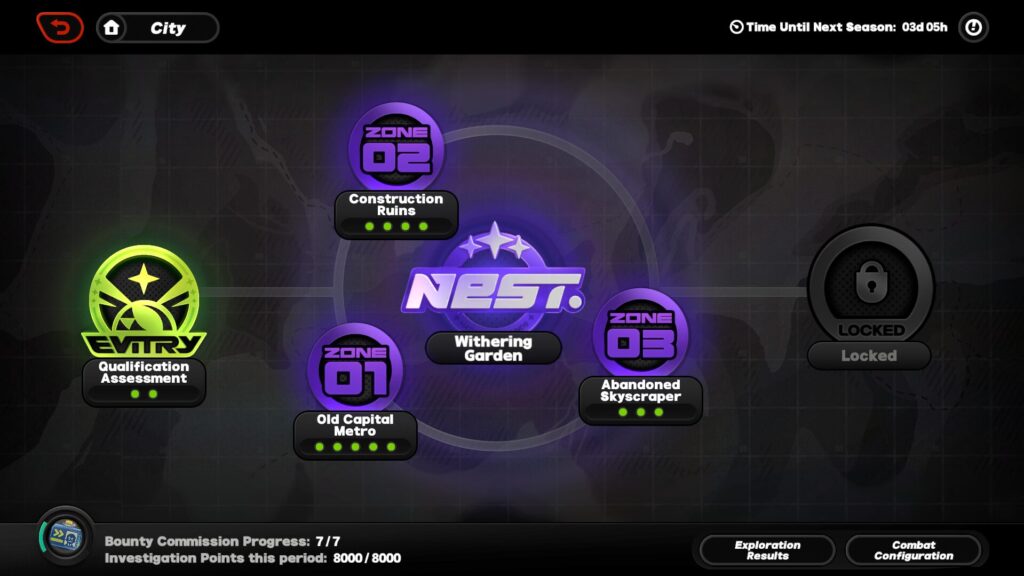
Hollow Zero Map
The map is divided into a tutorial zone, 3 zones that resemble the previous zones you’ve visited before during Story Commissions- each one containing the same boss. To reach a boss, you must progress through each floor of the Hollow until the end and collect Resonias and upgrades.
Exploration Gameplay
Similar to Exploration Commissions, Hollow Zero relies on your ability to travel through a grid/tile system of TVs. Each step you take on a new tile adds 10 pressure by default, this pressure can be increased through different means (Corruptions, Traps or NPC effects).
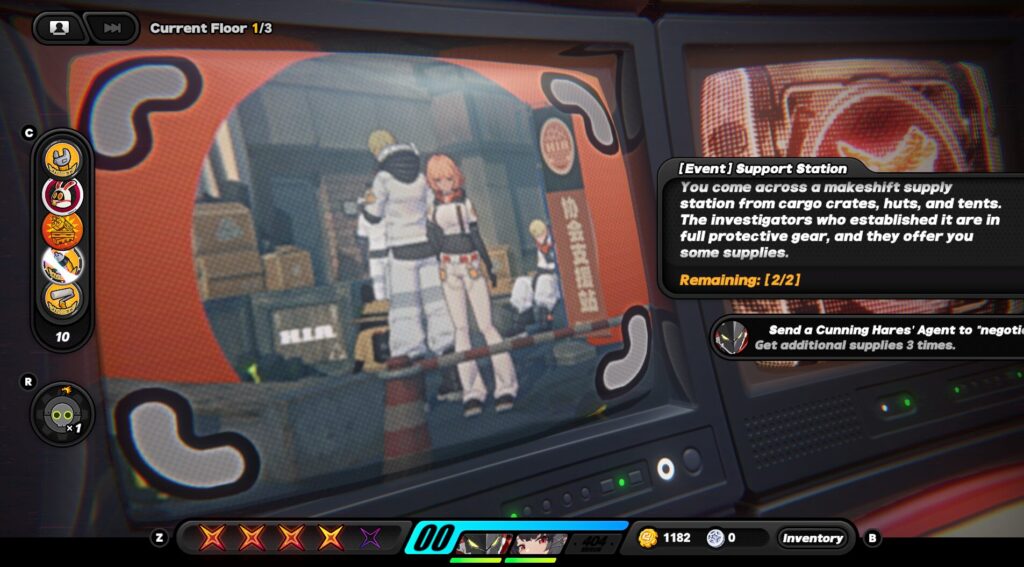
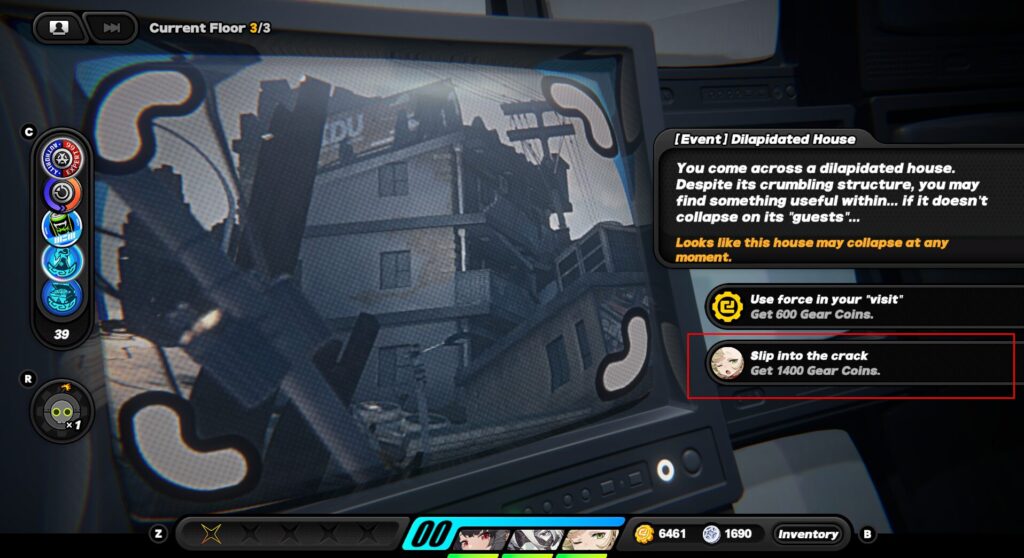
These tiles also contain events or traps that can affect your exploration by granting you rewards or increasing your pressure for items as a transaction. Some of these risks are not stated but if you comply, you might found multiple rewards when choosing correctly or committing to collecting pressure.
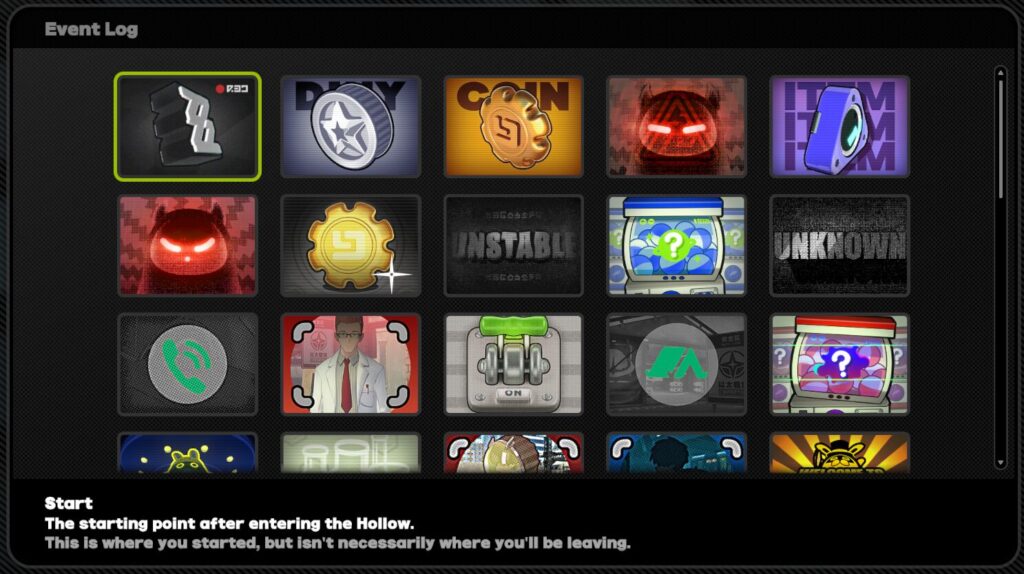
If you need information about any type of tile, check your Event log by pressing Pause while exploring a Hollow Zero zone.
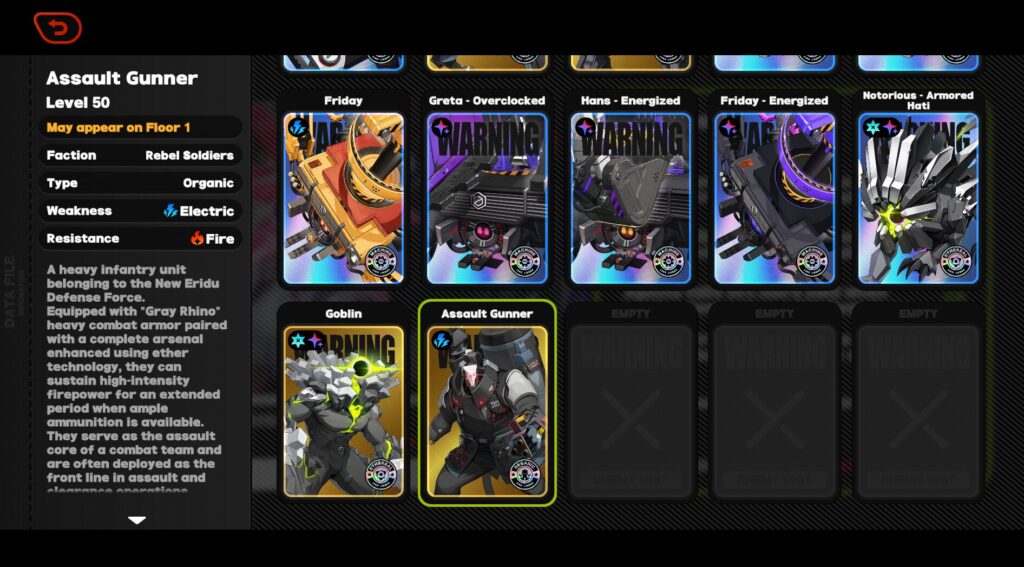
You can also check the enemy line-up inside the zones before starting a run by clicking on the Key Enemy Info at the bottom right when selecting a zone and it's difficulty.

Pressure
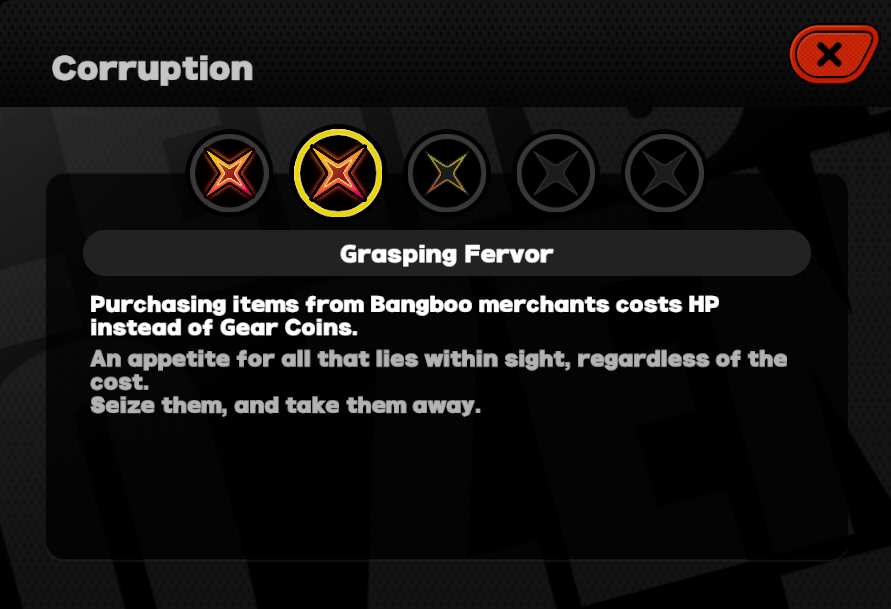
Once you fill the Pressure to 100, this value resets and you gain a Corruption; an effect that affects your exploration, transactions, ability to battle and more; and each one is randomly applied from a pool of corruptions. Once you carry 4 Corruption, the 5th one will apply a special corruption that can be detrimental to your run and can buff the final boss of the zone.
Note: Any corruption can be removed at certain event tiles; sometimes for free and sometimes for a price.

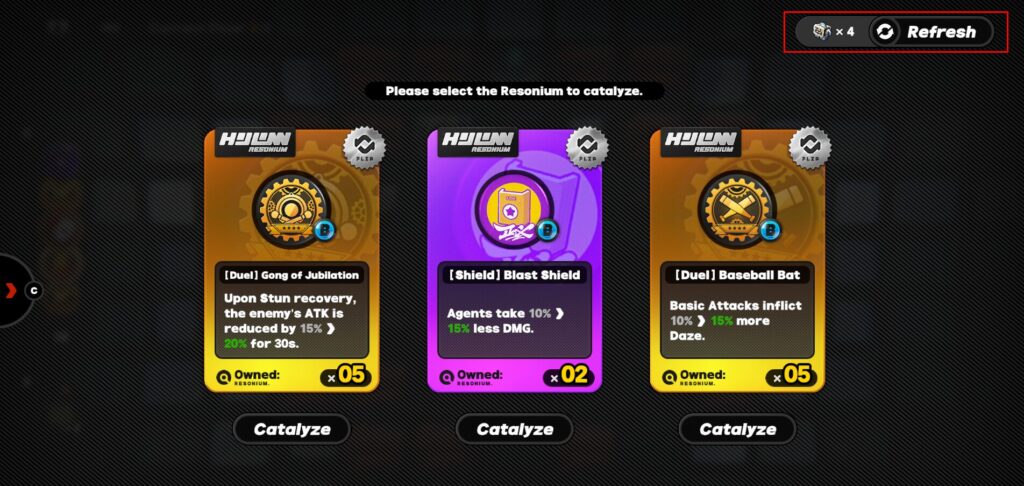
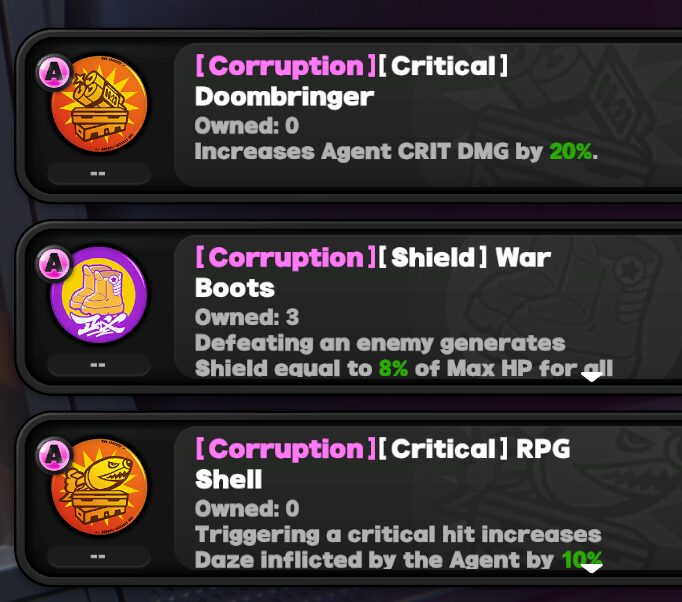
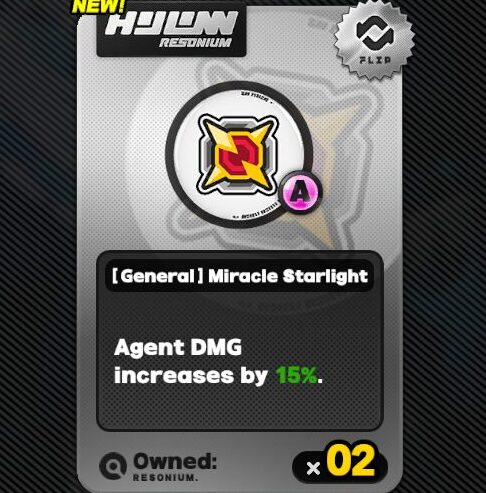
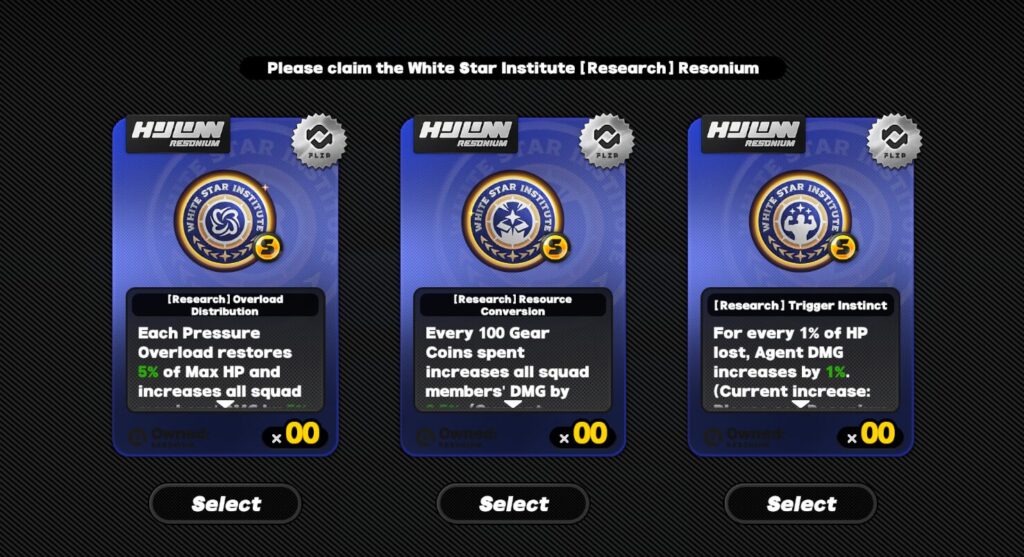
Resonium
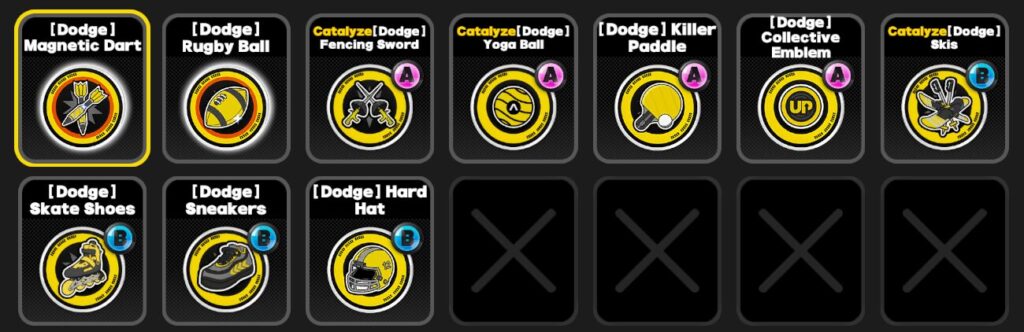
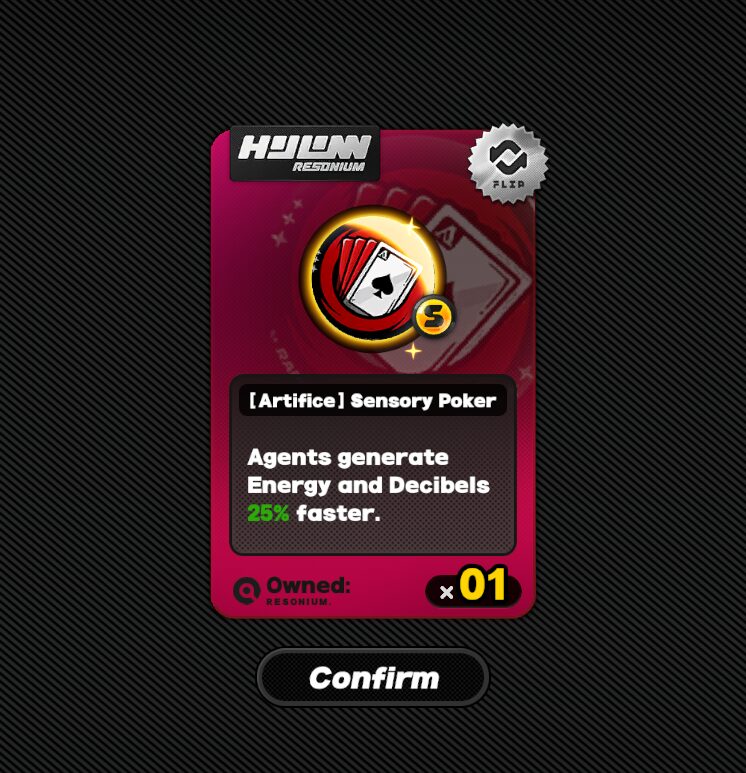
These are card effects you’ll obtain after every combat encounter, shop or gacha tiles. They exist in various types such as: Attributes (based on an element), Duel, Dodge, Critical, Shield, Energy, Assist, Synergy, Hollow, Artifice, General and Affinity.
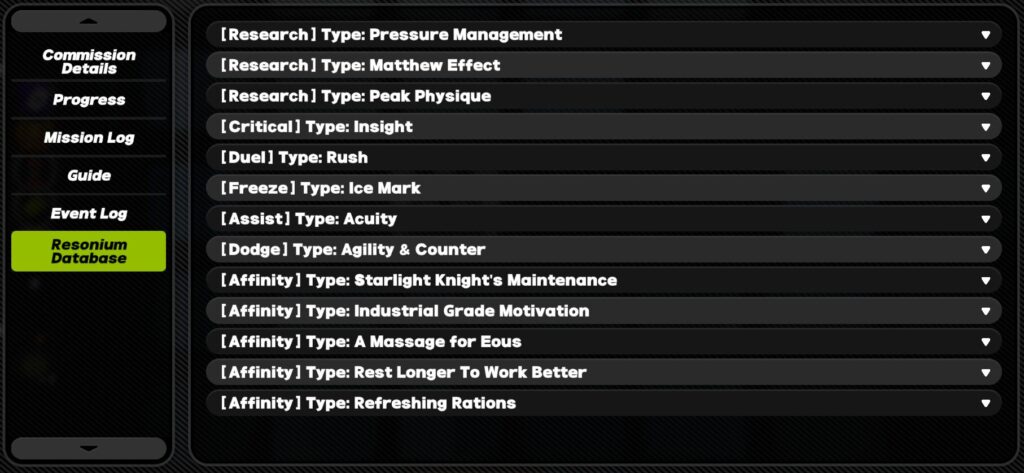
If you need information about any type of Resonia, check your Resonium Database by pressing Pause while exploring a Hollow Zero zone.
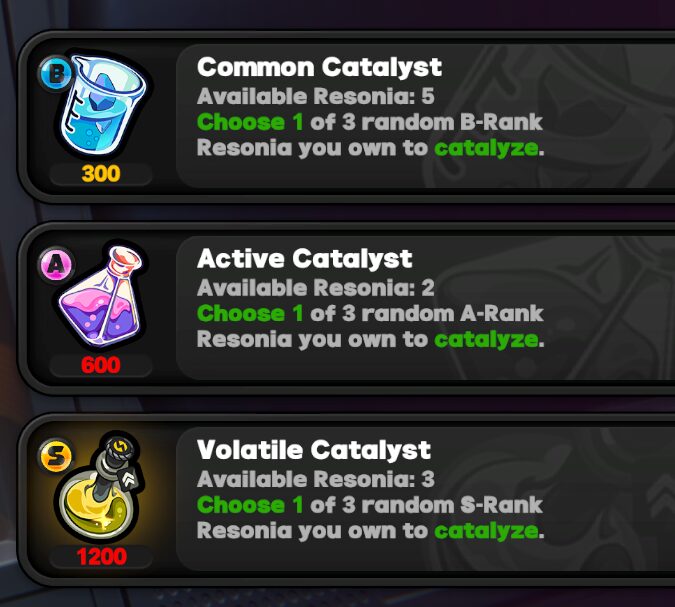
These Resonias can range from Rank-B to Rank-S, ranks only affect their pricing at the Shops or Catalyzers. Their Ranks also grant different abilities within that type of Resonia for specific Attributes or Skills.
At the start of your run, you're given a Research Resonium and 1 of 3 Collective Emblems for a higher drop rate of a specific resonium during your run.
When picking 1 of 3 Resonias from Gacha tiles or Catalyzing, you can reroll 1 to 5 times by upgrading your Combat Configuration.
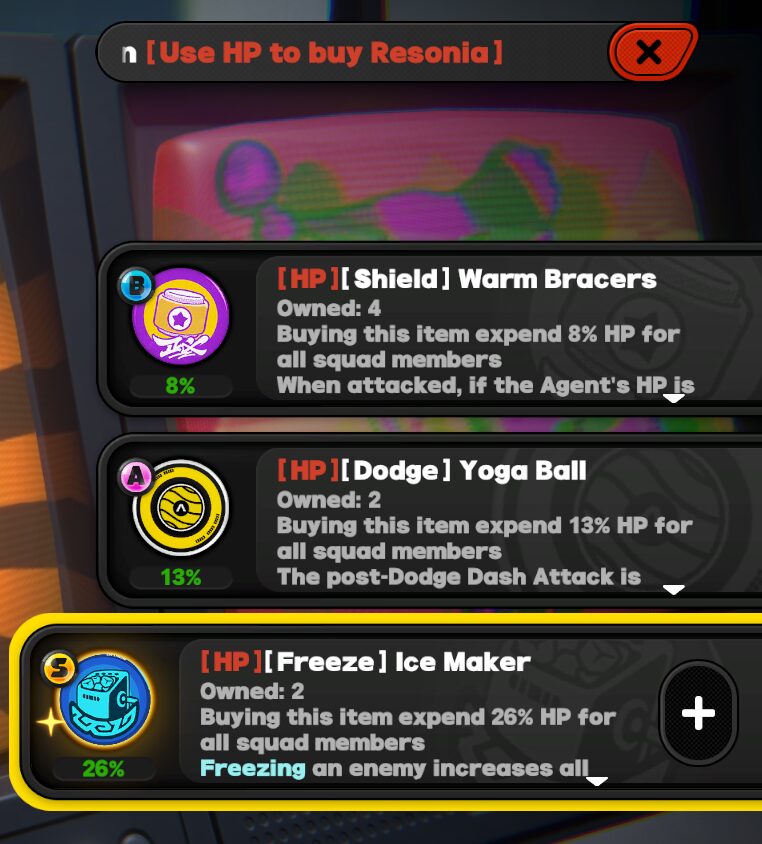
You can also acquire Resonias from B-Rank to S-Rank, varying in prices as well as Catalyzers- however depending on your corruption or some shop, you can find that some ask for HP in exchange instead of Gear Coins or offer a Risky Transaction, which adds a corruption for any Resonia you pick.
Each type is focused on a specific character skill that can spice up your playstyle with every agent in your squad. Here’s a rundown on each type:
- Attribute Resonias: They focus on buffing a specific attribute and adding additional effects to their anomaly and damage output. This type of Resonia drops specific attributes based on your current agents.
For example: If you have Lycaon, you’ll gain Ice Resonias. But if you also have Billy, it will drop both Ice and Onslaught.
- Duel: Focused on Defensive Assists, Chain Attacks and increasing the Daze gauge as fast and consistent as possible.
- Dodge: Focused on Dodge Counter and Dash Attacks, as well as making dodging easier and adding abilities proc after a Perfect Dodge.
- Critical: Focused on increasing the Crit Rate and Crit DMG of characters in form of stacks as they land hits to build up for a burst of damage.
- Shield: Focused on sustainability, granting shields to on-field characters after using their skills and buffing their stats while shielded or creating a shield in critical moments of the fight.
- Energy: Focused on generating Energy for EX Special Skills and decibels for Ultimates, prepping your entire squad before and during the fight to deal massive damage.
- Assist: Focused on supporting your squad by buffing, granting shields, generating energy and more; after performing any kind of Perfect Assist and follow-ups.
- Synergy: Focused on beefing your Bangboos’ stats; simply buffs their base stats of all your current Bangboos during combat.
- Tenacity: Focused on high-risk high-reward gameplay, sacrificing a % of agents HP to obtain buffs of various kinds.
- Hollow: Drops randomly during the runs by stepping on specific event tiles, ranging from buffs to your squad or easing the difficulty of exploring Hollow Zero. These Resoniums are rare to come-by yet they cover certain niches under specific circumstances.
- General: Drops randomly during a run or by other agents when replacing them with a newfound agent or rejecting their calls. These can be targeted by adding those characters to your squad at the start and then replacing them or rejecting their call to help.
Note: You can only acquire a General Resonia from rejecting a call if your squad already has 3 agents.
- Artifice: Drops on Corrupted Gacha Tile, they grant a debuff effect for the next 2 combat encounters; after 2 combats, it will remake into a positive buff based on its description.
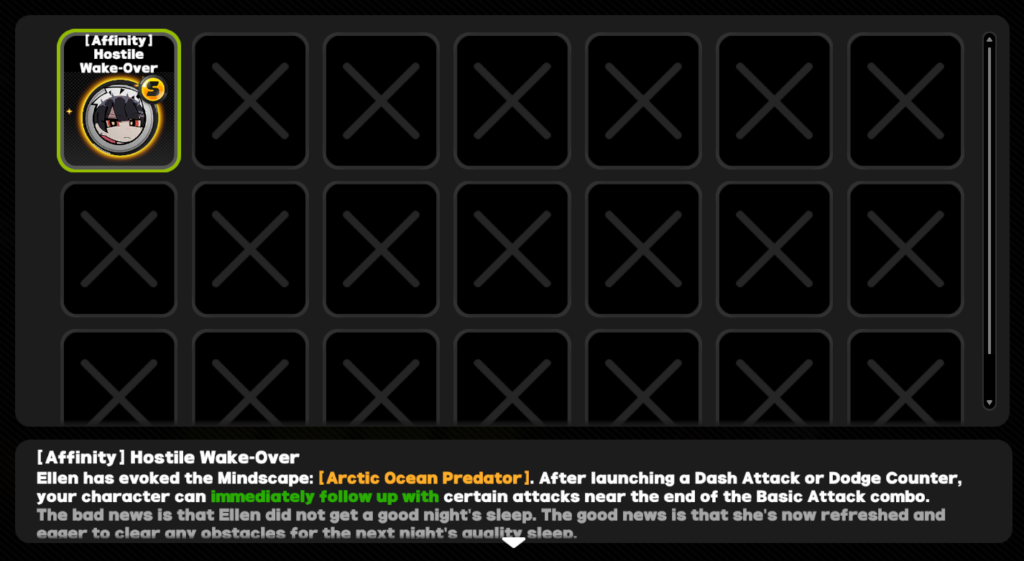
- Affinity: Drops randomly during Safe points by agents in your squad when stepping into a Campsite tile which can randomly grant an Affinity Resonia of any agent inside your Squad- however, you must have said agent at Trust Lv3.
This type of Resonia is unique and can change your Agent’s damage output and add a new combo to your rotation; they can be catalyzed by committing to their demands based on the character’s personality.
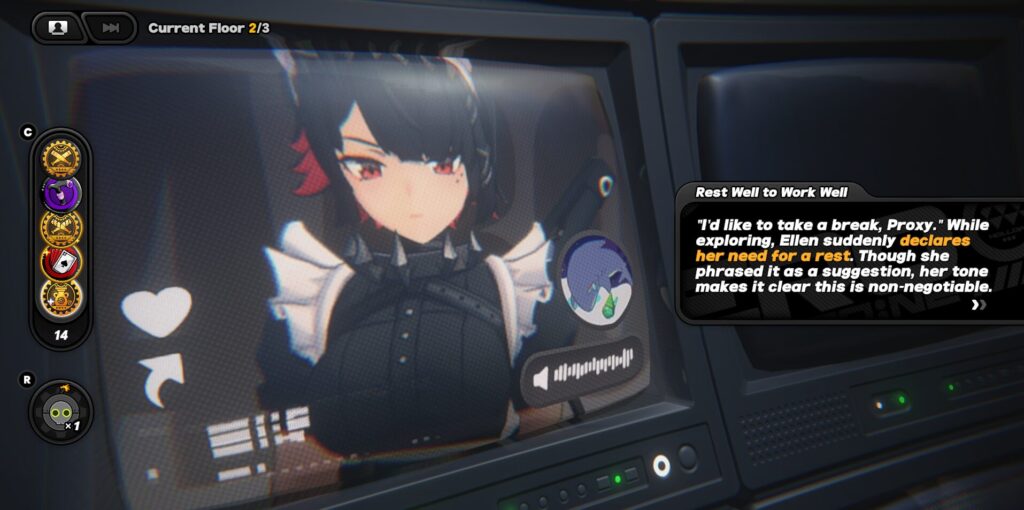
For example: Billy asks you for a loan of 500 Gear Coins or Ellen wants a longer nap, leaving your squad temporarily for 1 combat encounter.
While this implies a risk, not all characters demand the same thing and rejecting any of them will not catalyze their Resonia and simply retain the non-catalyzed version.
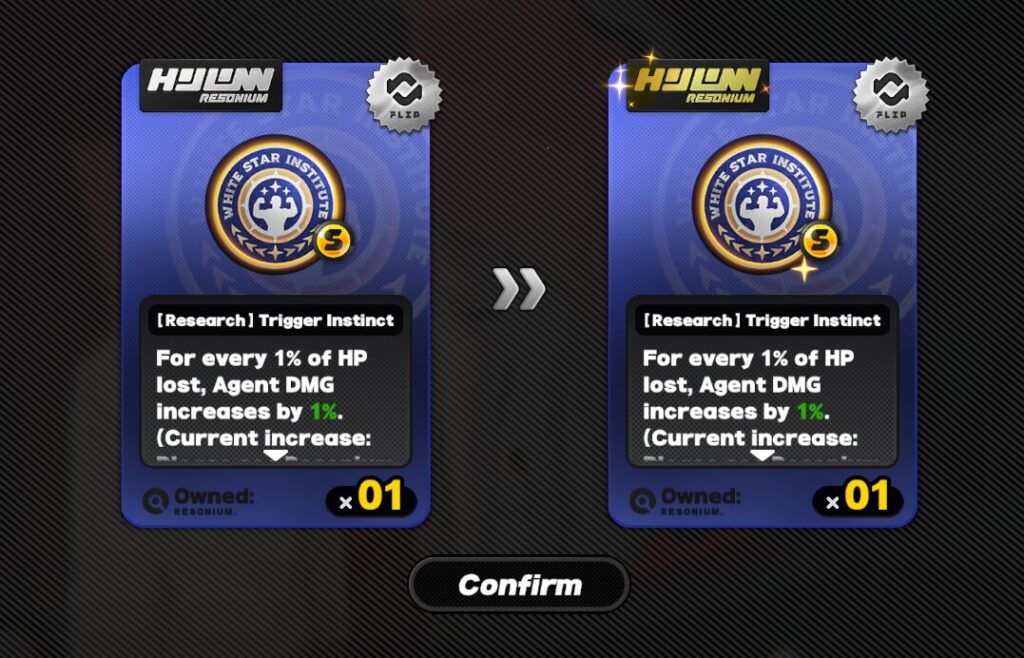
Catalyzed Resonium
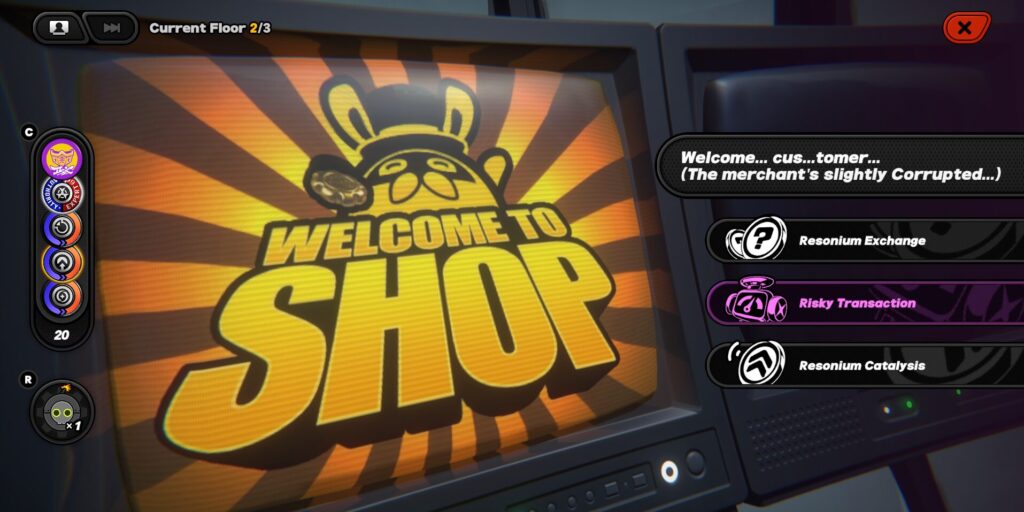
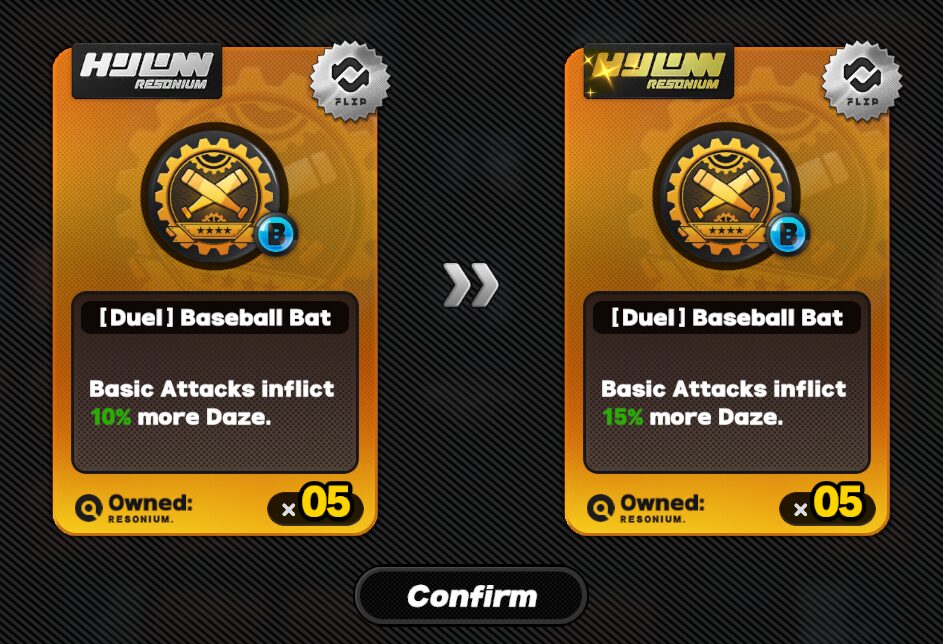
At the shop or random events, you can catalyze Resonias at random or from a selection; some choices are based on rank, some are at random- and the prices when picking a catalyzer vary based on the rarity.
Infused Resonium
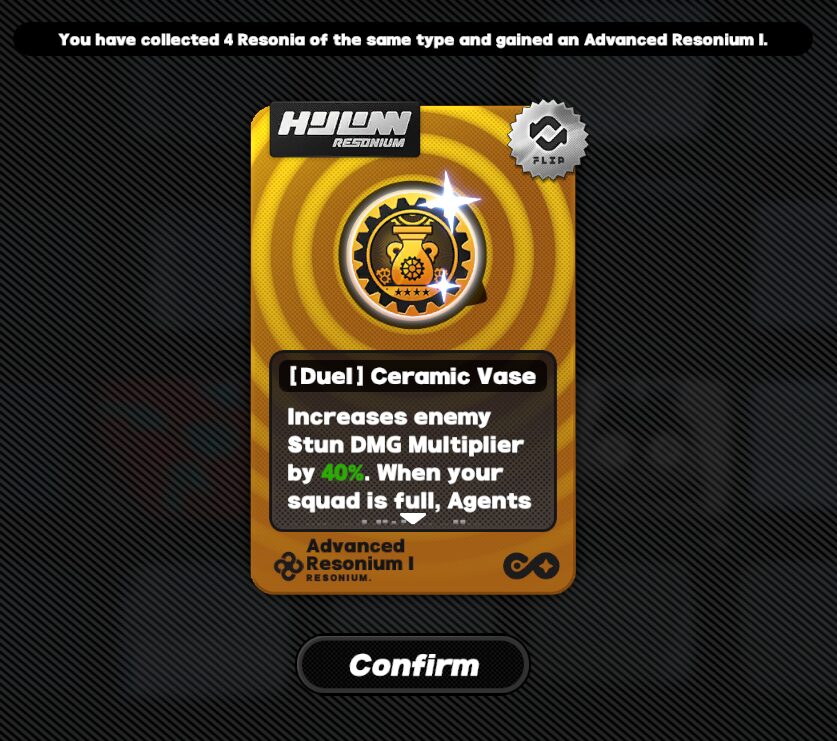
You can create an Infused Resonium after obtaining 4 Resonium of the same type and can happen again after an 8th Resonium is acquired. This Infusion doesn’t happen to certain types: Affinity, Artifice, General and Hollow.

Resonium Remakes
When landing on a Corrupted Gacha Tile, you’ll acquire an Artifice Resonium. After 2 combat encounters, it will revert the debuff into a permanent buff for the rest of the run. This type of Resonia cannot Catalyze nor Infuse.

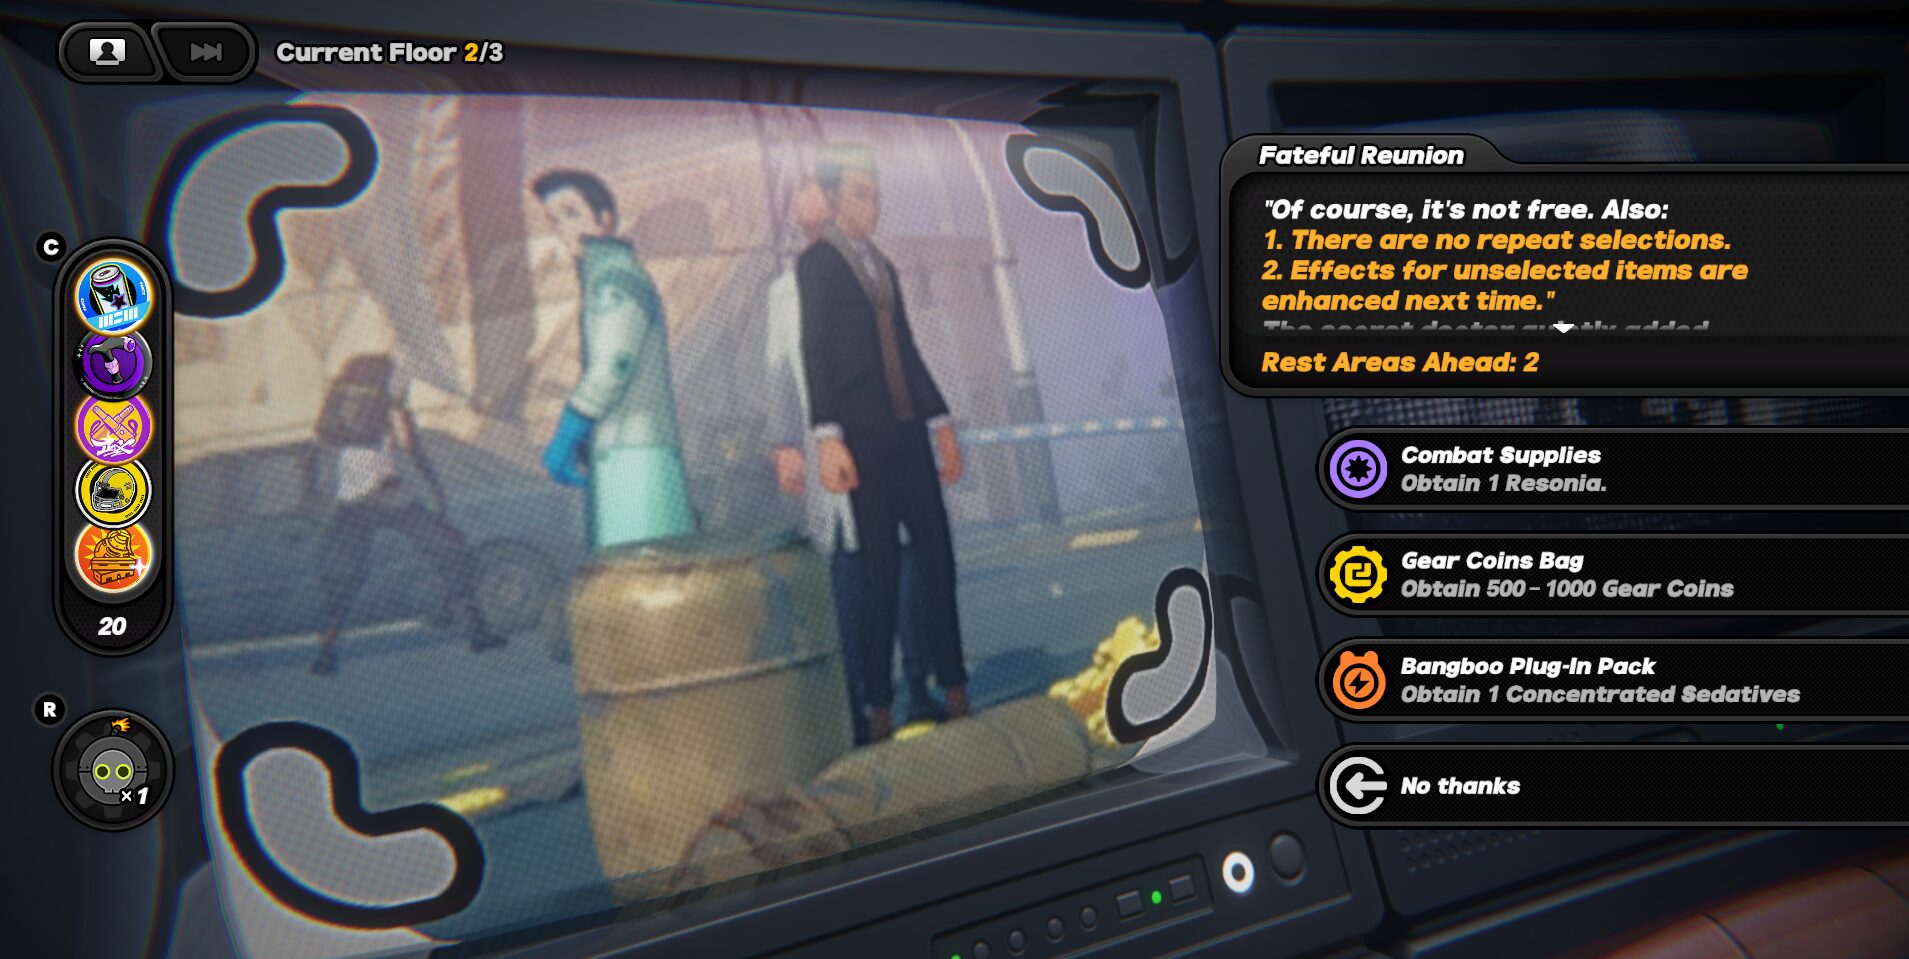
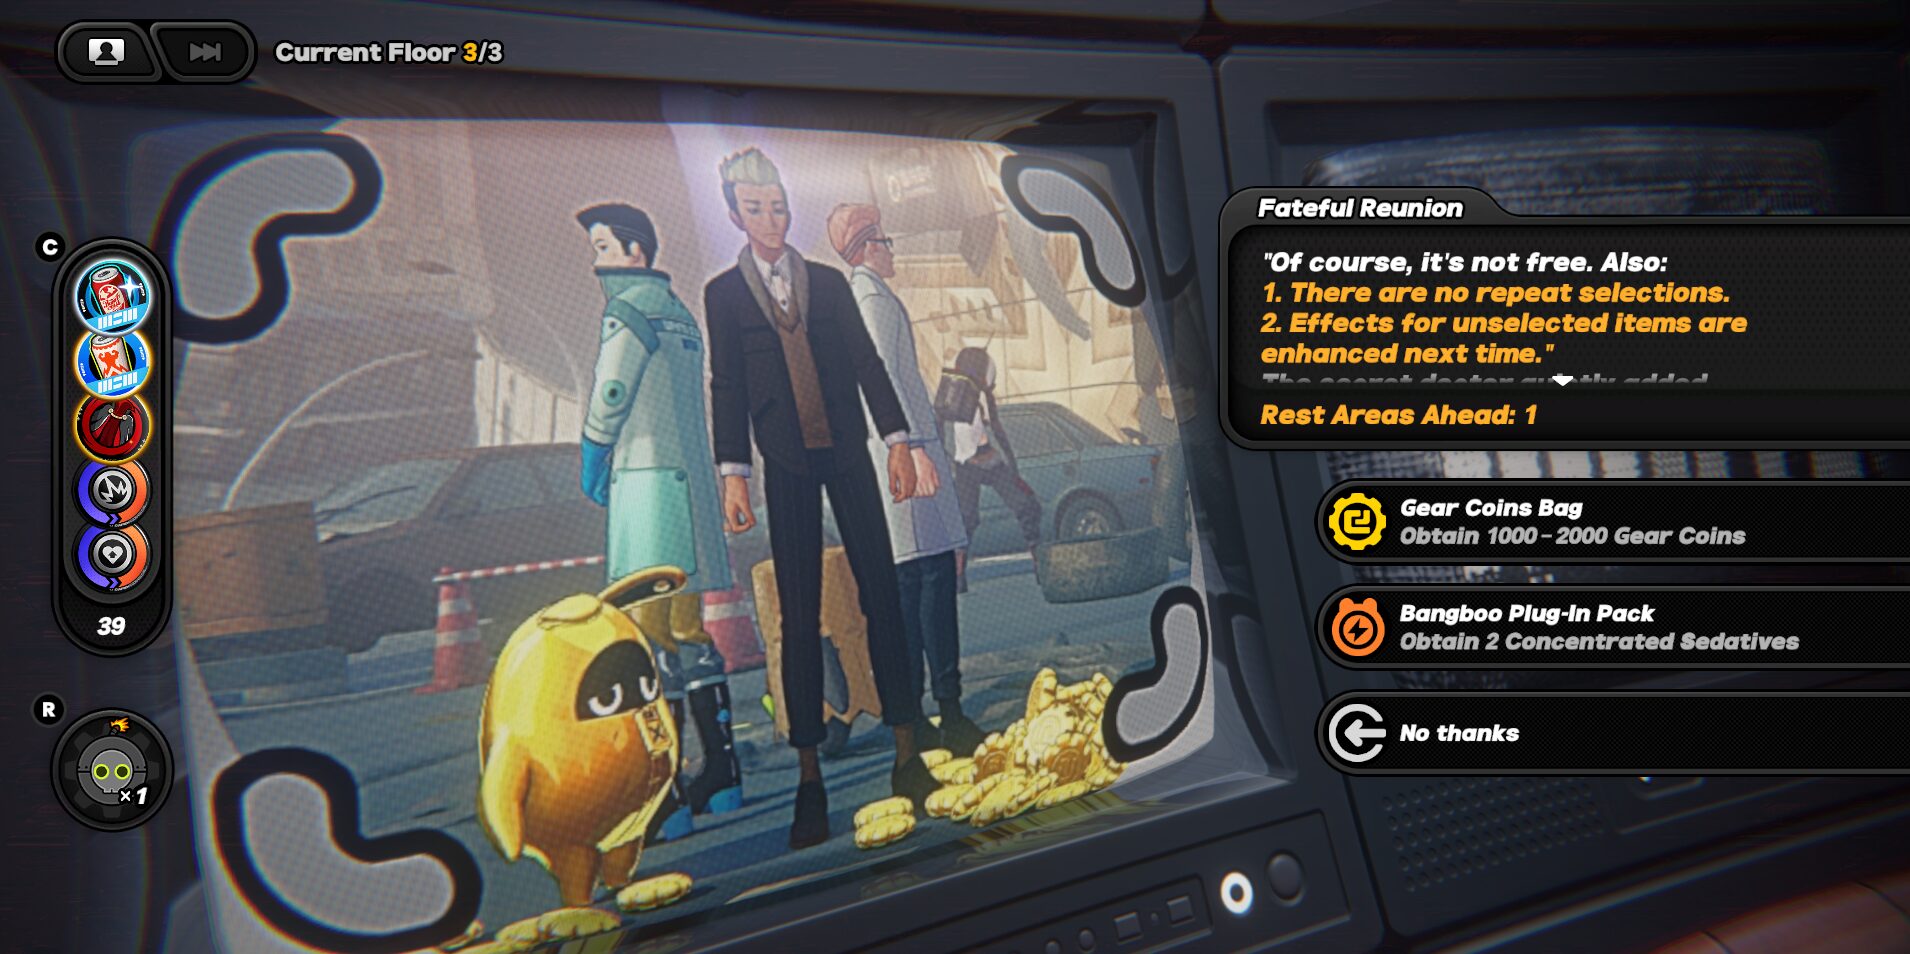
Researchers
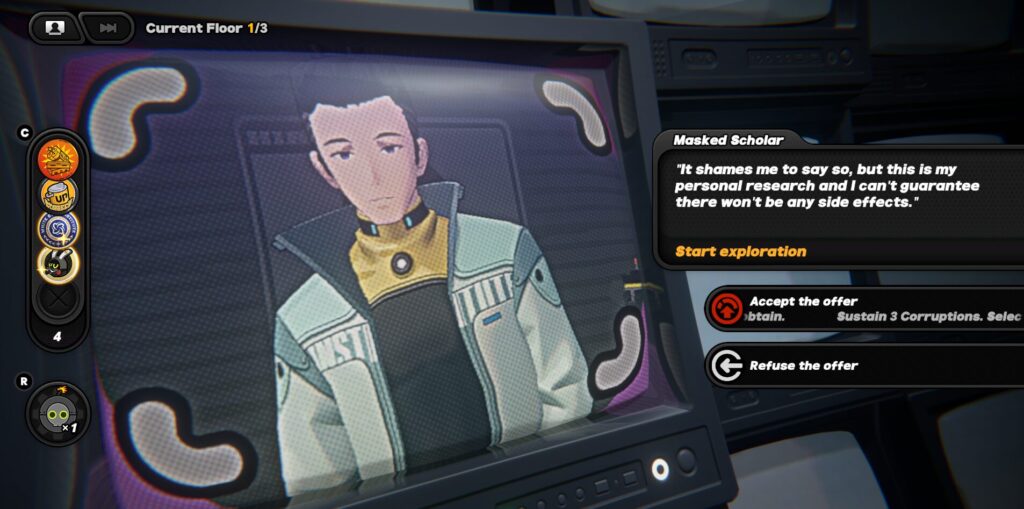
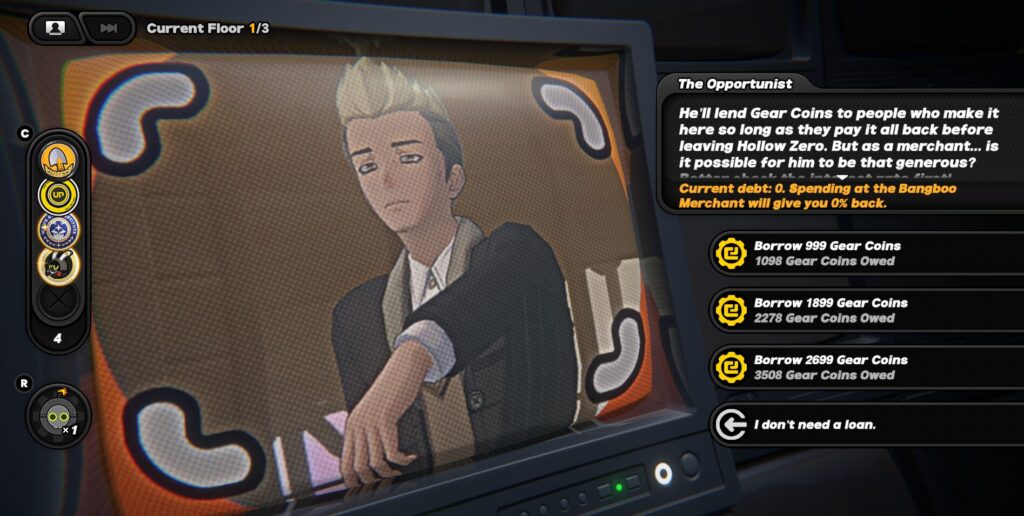
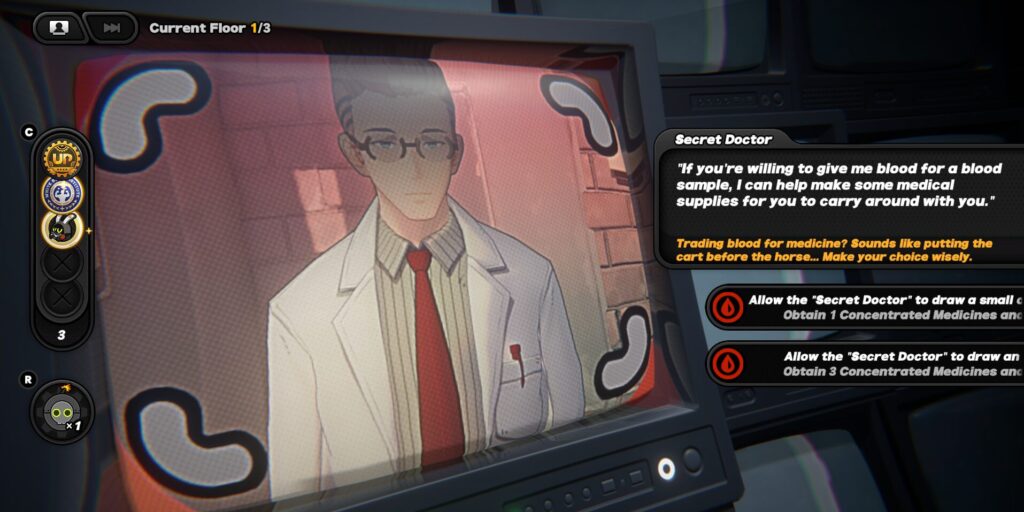
Every zone has a Research NPC: Masked Scholar, Secret Doctor and The Opportunist; while the Withering Garden has all 3 NPCs.
Each NPC will grant you a Research Resonium related to their gimmick, whether its gear coins, corruption or paying with HP; the Resonium will grant you a buff as you play along.
You meet them at the start of the zone and every floor, offering you a deal and a risk. Deals can vary based on your progress and they range from acquiring gear coins to lowering pressure. While Risks range from corruption, spending HP or increasing debt- however all of these Deals and Risks depend on your zone and the assigned Researcher.
If you satisfy their research and meet them at the Safe point, they’ll grant you more rewards and catalyze your Research Resonium. This hidden objective depends on their gimmick:
- Masked Scholar offers to apply 2 - 3 Corruptions on you based on the difficulty, if you clear all of them or carry 5 corruptions and meet him, he’ll catalyze your research resonium and grant additional rewards based on the amount of corruptions you currently carry.
- The Opportunist creates a debt at the start and you may increase it when reaching the Safe point. Paying the debt at the end of the run will catalyze your resonium and offer random deals at the cost of 2000 coins once the debt is paid.
- Secret Doctor demands HP in a % and gives you Concentrated medicine based on the amount offered. If you meet him at a Safe point at full HP, he will grant a bonus reward and, to catalyze, you must give him 2 Concentrated Medicines. He also offers better deals in exchange for the Concentrated medicine he gave you or found during the run after upgrading his resonium.
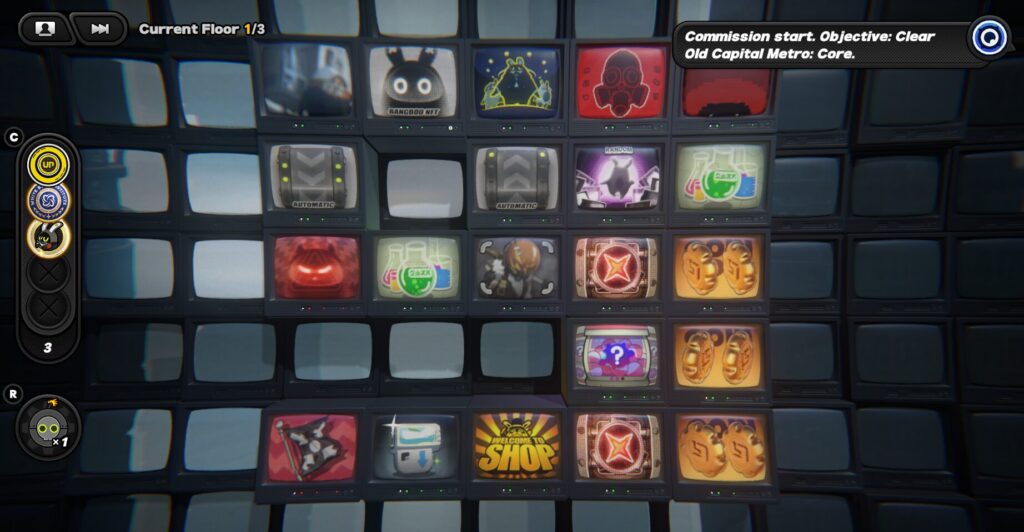
Hollow Zero Structures
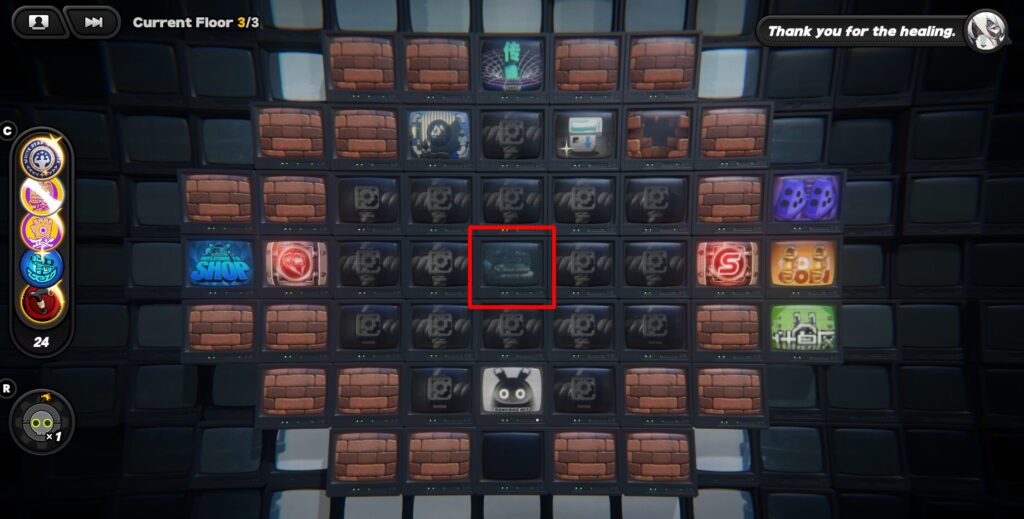
The Tilesets of each Hollow Zero run are pre-determined but the connection between each one is different and the pools of tilesets are different in every zone.
For example: Looking at the images, their letter and order. You can find this set of tilesets (and more) in any given order, such as A B C, B C A, C B A and so on.

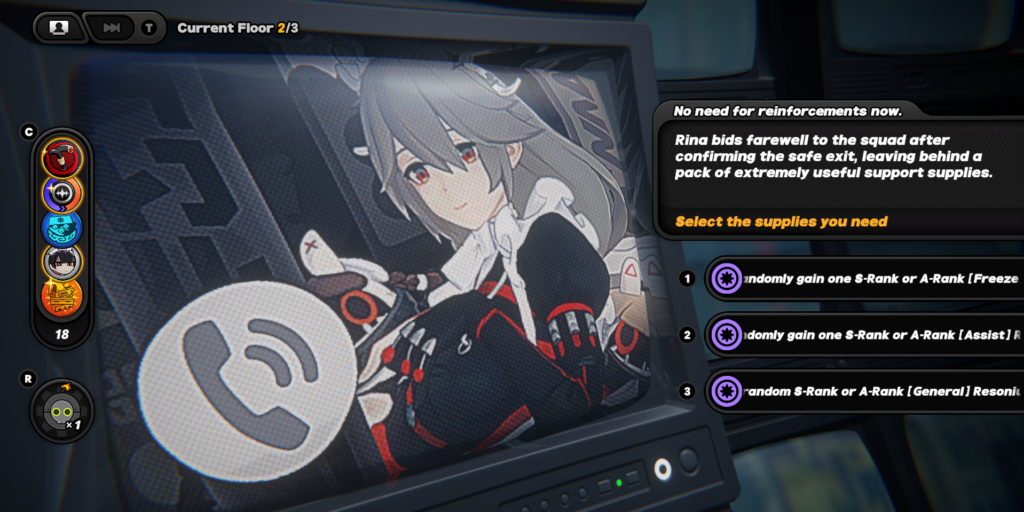
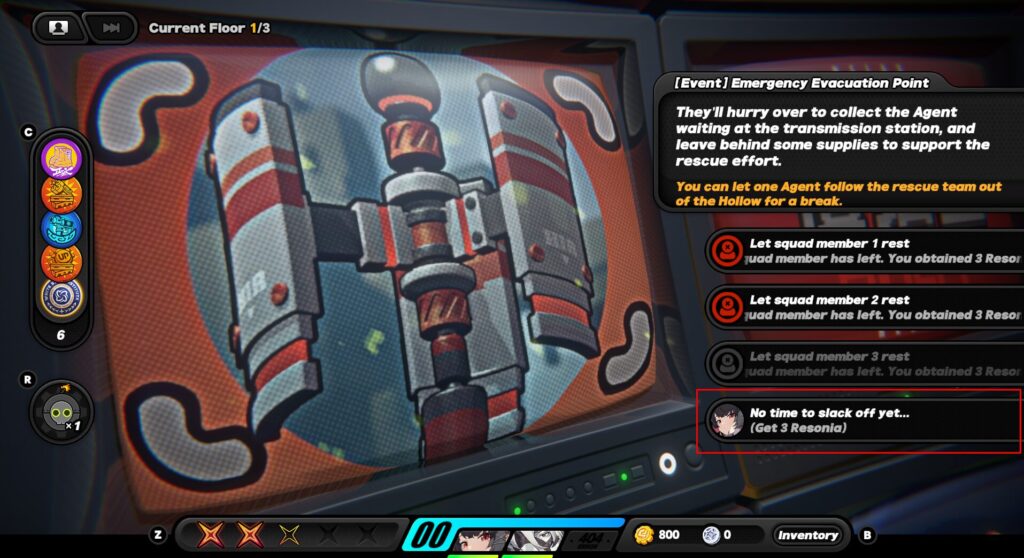
The event tiles placed are randomly selected- yet the Call for Support tiles, which let an agent join your squad, are placed at certain points of your run and the order of which agents call isn’t directly related to the amount of agents you picked before the start of the run.
The order can be affected if you carry 2 or 3 agents; but when you’re running with 5 possible agents to join your squad, the order may be random. Rejecting any of the calls after your squad has 3 agents grants a Hollow Resonia.
Special Character Events
Certain agents can help you clear traps in certain event tiles based on their body-type and personality (Short, Medium and Tall). They can grant additional rewards while completely avoiding the risk.
For example: Ellen loves sleeping but also hard working, rest-related event tiles will grant additional rewards.
Billy works for the Cunning Hares, which excel at making deals with other raiders or investigators.
Short characters such as Soukaku or Piper can fit in destroyed buildings to retrieve Resonias or Coins at certain Event tiles.
Disclaimer: Due to the low amount of characters currently in version 1.0, it’s hard to determine the main factor that triggers these events and its consistency.
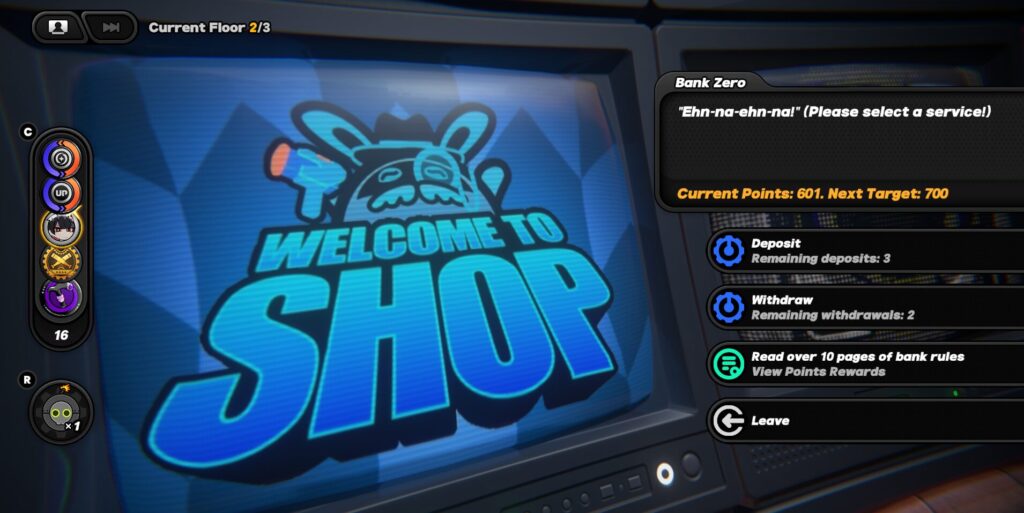
Bank Zero
Bank Zero is a special tile mostly found at the left side of the Safe point and offers rewards based on a milestone system depending how many points you had deposited- and you may withdraw rewards by consuming points. It offers various deposits that consume either % of max HP, 300 Gear Coins or add Pressure. Every deposit adds a set amount of points and every milestone grants a Resonia and can guarantee a free random Resonia next time you visit.
Note: Points are shared across all zones in Hollow Zero.
Combat Gameplay
Similar to Combat Commissions, their main difference is how Resonias and their infusions affect your playstyle and consistency on Chain Attacks, Dodge Counters, EX Special Skills and Ultimates.
Keep in mind that some Corruptions can affect you mid-combat and Bosses damage output.
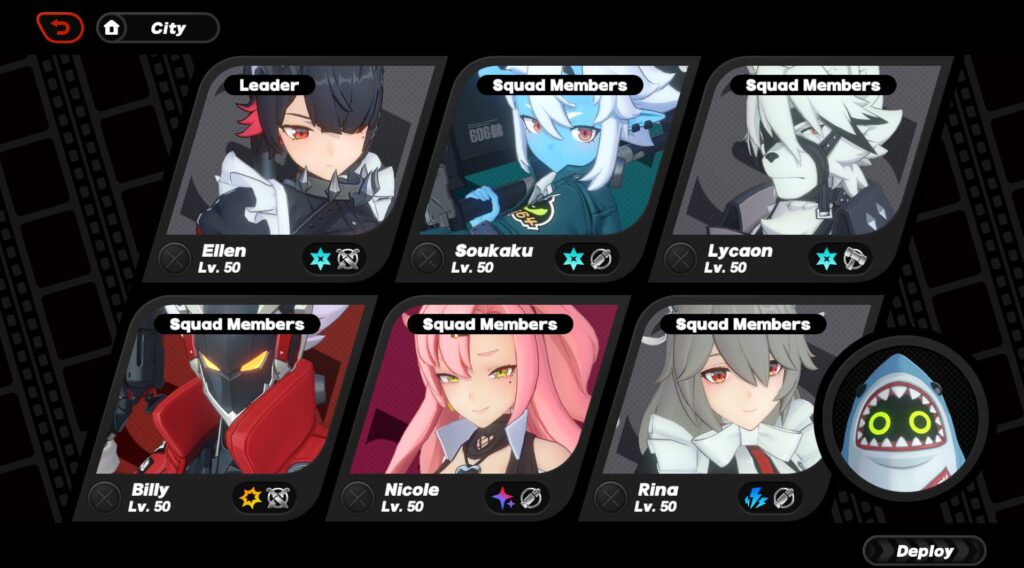
Squad Setup
Your Squad will always start with a Leader and you can choose other agents from your roster to join at a random order. In order to add more than 3 Agents, you must increase your Inter-knot Level and choose up to 5 additional agents.
If you don't select any additional agents, every Call for Support! tile will offer you 3 deals and you may only pick one: Heal 10% max. HP, 500 gear coins or -30 Pressure.
Your Bangboo will always be available for Chain Attacks once the Daze gauge is at a 100. Other bangboos can join your squad up to 3 Bangboos- yet if you find more bangboos, you’ll be forced to replace one of the two additional ones, your starting Bangboo isn’t included.
If you have an S-rank Bangboo in your roster but are not equipped, they can also join you during your run at a random chance.
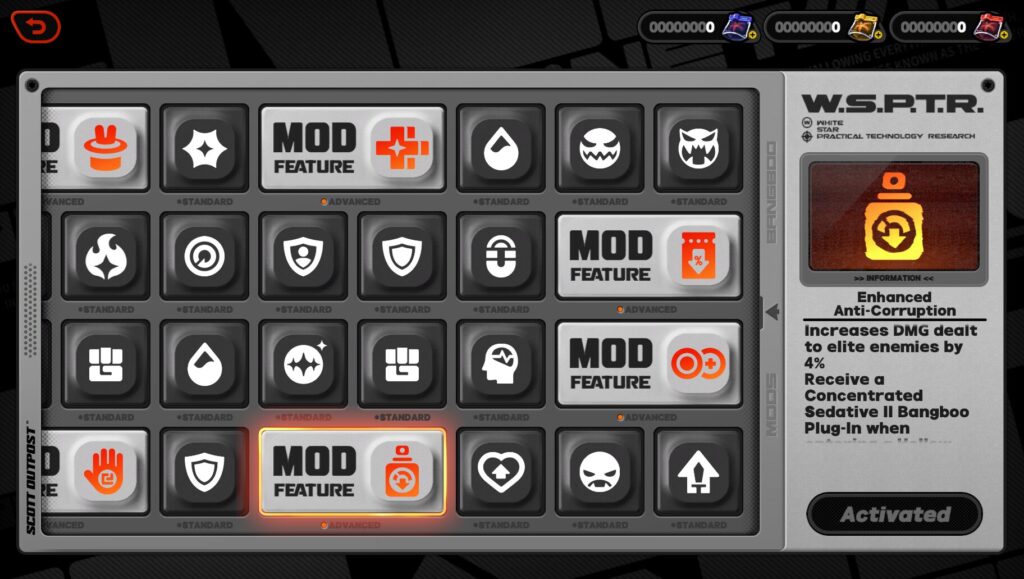
Combat Configuration
This is a list of permanent upgrades you can acquire by spending 1 of 3 Crystals collected from each zone and progressing from left to right on the Combat Configuration Menu. The upgrades’ prices scale on how far you’ve progressed.
Note: These crystals can be farmed by running Hollow Zero multiple times.
The Standard upgrades can be acquired by simply clicking on them- however you must unlock them from left to right without skipping any upgrades.
Once you collect all the Standard upgrades surrounding the Advanced upgrade, you may purchase it.
If you’re missing any Standard upgrade, you cannot purchase that specific Advanced Upgrade.
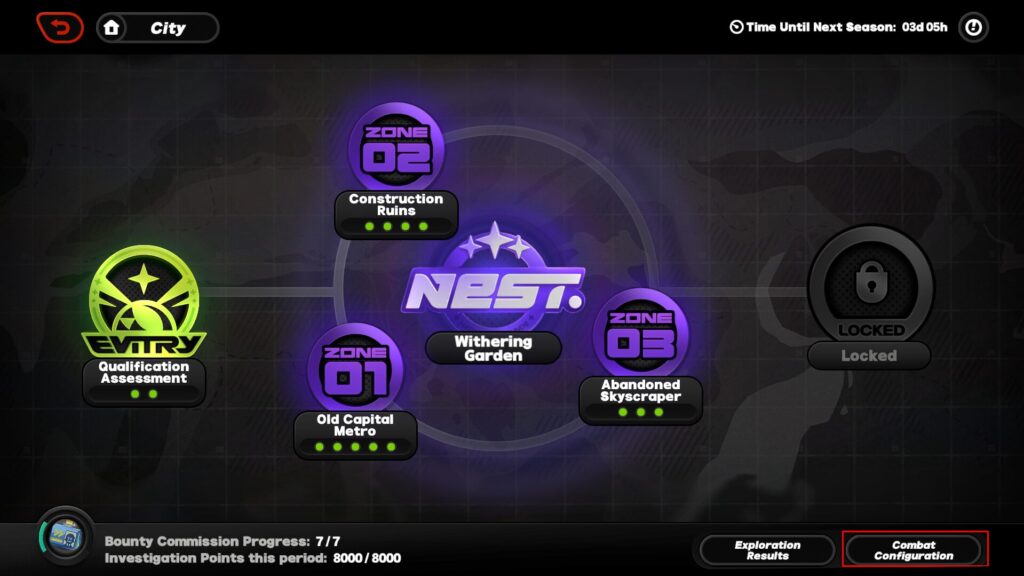
Withering Garden - Exploration
It’s the final zone among the main 3 and its difficulty varies on the choices you make along the run.
For starters, you can pick Ether Activities after your first Withering Garden: Core clear. These will allow you to increase the intensity of the zone, offering a challenge to those who seek tougher exploration and difficult boss battles.
You must clear Ether Activities in set of 3's, beating Nineveh at Low, Medium, High and Extreme Intensity.
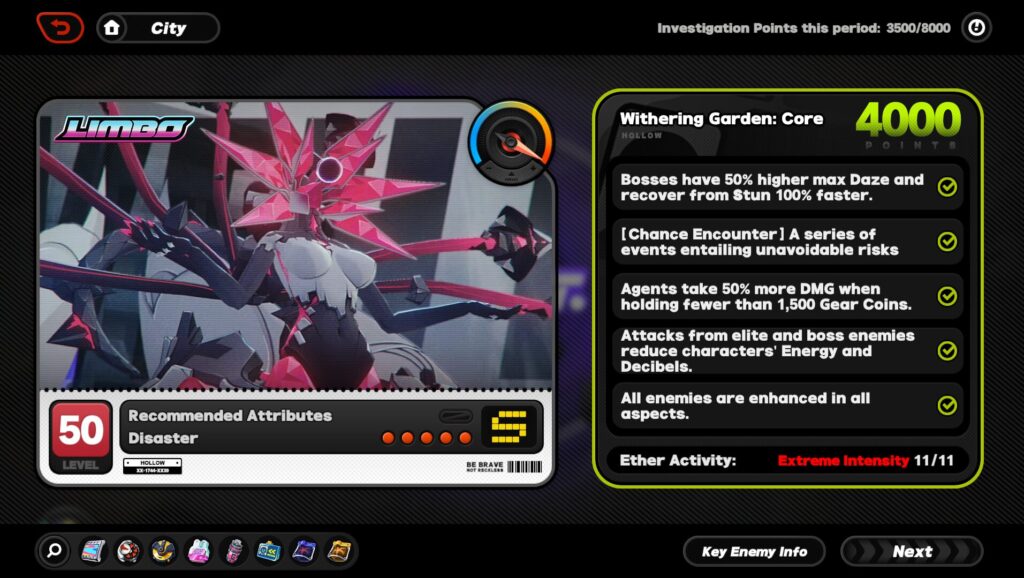
At the start of your run, you'll find all 3 Researchers from the previous zones and they will offer you 1 of 3 buffs and 1 of 3 debuffs at the start, then 3 escalating Deals and 3 escalating Risks at the start of every floor.
Buffs:
- Pressure intake reduced by 40%.
- Obtained Gear Coins increased by 20%.
- All agents’ HP restored by 30% after a combat encounter.
Debuffs:
- Each step on new tiles adds an additional 3 Pressure.
- Items become 15% more expensive.
- Your agents’ HP cannot exceed 80% Max HP.
You’re given 1 of 3 Research Resonias, the same ones you’re given at the previous zones, but you can catalyze them right before the final boss for 500 gear coins rather than performing the Researcher’s gimmick.
Everytime you encounter them, you can pick a Deal and a Risk- but the rest of the options escalate the next time you meet them at a Safe point and won’t repeat.
Note: You may also skip 1 Risk once per run after reaching the Second or Third floor.
Withering Garden - Blitz
This is a combat-only version of Withering Garden where you clear groups of monsters on every floor, usually 2 - 3 groups. Clear each group grants 1 of 3 types of Resonias and defeating a boss grants 3 resonias of a specific type.
All system from the Exploration version still take place on the Blitz versions.
You can select a series of Ether Activies, similar to the Exploration version, that increase the combat's difficulty.
Once you reach the final floor, you'll have the usual encounter against Nineveh.


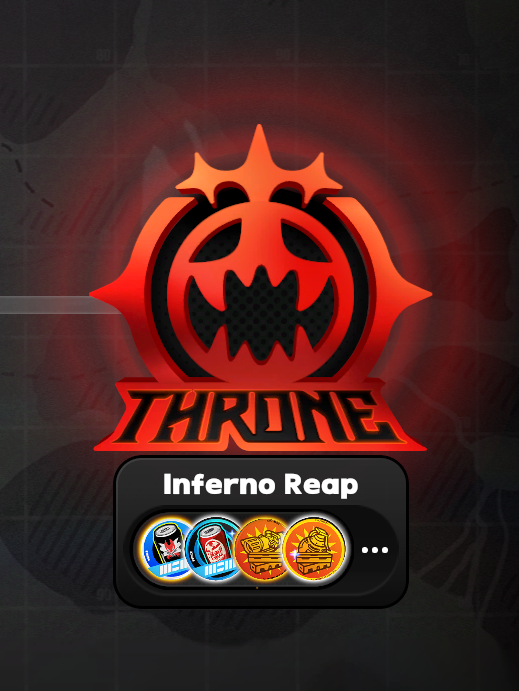
Inferno Reap
Inferno Reap is the a new gamemode added to Hollow Zero after completing a Withering Garden: Core run and the Inferno Reap commission from HSO at the Scott Outpost.
Unlike other Hollow Zero zones, there's no TV Exploration gameplay, it's only Combat Gameplay. After completing a run on Withering Garden: Core, regardless of your Ether Activity selection, all the Resonias collected will be converted into a kit that you can select before attempting Inferno Reap.
During Inferno Reap, you'll make a squad of 3 agents and 1 bangboo as usual and fight Nineveh for 3 minutes and 30 seconds. Killing Hornets and Vines around Nineveh will extend that timer by 3 seconds.
If you defeat Nineveh, the timer will stop and a set of Vines and Hornets will spawn around the arena; allowing you to extend the timer before Nineveh recovers her entire Health and fight her once again. During the last 60 and 30 seconds on the timer, both you and Nineveh take increased damage.
Once the timer is up, all damage dealt to Nineveh is calculated and grants you rewards based on:
- Knives Out
- Total Amount of Vines killed (Multiple Runs)
- Total Amount of Hornets killed (Multiple Runs)
- Forged in Battle
- Total Amount of Damage Dealt (Multiple Runs and up to 200 million)
- Bullets to Petals
- Damage Dealt in a single run (up to 30 million)
List of Rewards from Inferno Reap:
- Polychromes
- Investigation Points (License EXP)
- Agent, Bangboo and W-Engine EXP
- A-rank Drive Disc materials
- Lost Items from the Old Capital (More polychromes from Ray)
- Dennies
Rewards
Due to Hollow Zero’s replayability, not only it rewards you on first-time clears but also for repeatedly playing this game mode and on its zones. One of its main rewards are Boopons which allow you to signal search in the Channel Bangboo, guaranteeing an S-rank Bangboo of your choice after 80 Signals.
License Level
You can acquire License EXP by clearing Hollow Zero zones for the first time and replaying any zone. Once you reach a threshold, you will level up your License and gain rewards for each level up to Lv60- however you can only acquire a certain amount of EXP per week via replaying so be sure to hit the cap every week.

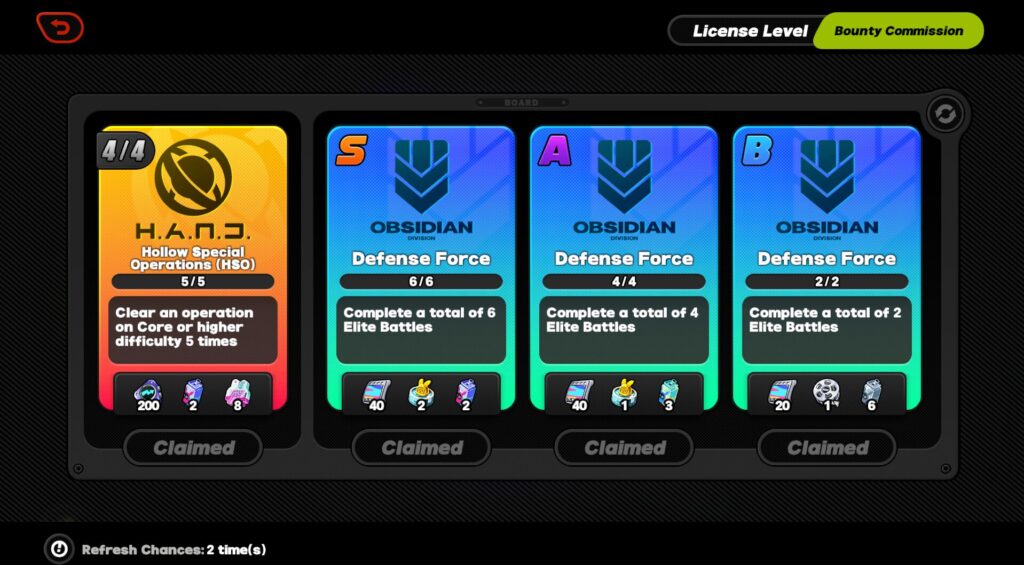
Bounty Commissions
These are weekly missions you can reroll before completing any of them. If you complete any mission, you won’t be able to reroll any of them. These are very simple and straightforward; their rewards range from Polychromes to Boopons and even Master Tapes.
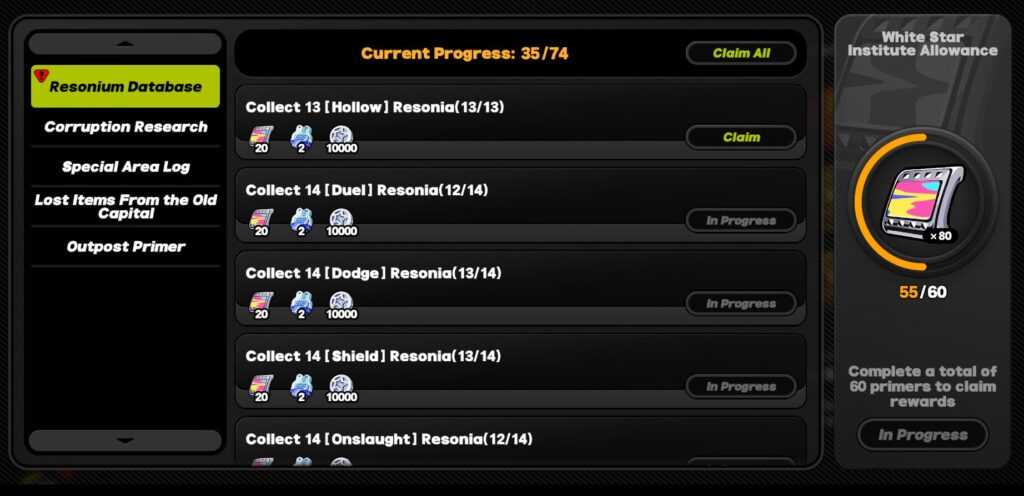
Research Log
Similar to achievements, it’s a one-time reward system that requires you to replay Hollow Zero multiple times and tracks your progress on a % for every objective you’ve done. Every 10 achievements in any category reward you a set amount of Polychromes.
- Resonium Database:
- Grants rewards by collecting a certain amount of Resonium of each type in total. Bangboos are included in this category.
For example: Collect 23 Affinity Resonium, related to the trust system and heavy RNG.
- Grants rewards by collecting a certain amount of Resonium of each type in total. Bangboos are included in this category.
- Corruption Research
- Grants rewards by discovering different types of corruptions across all of Hollow Zero zones- 5th Corruptions included which are irremovable.
- Special Area Log
- Grants rewards by entering different Random event tiles.
For example: Area Codename: 7777, hit the number 7 four times in a row on a roulette minigame, it’s RNG finding it but guaranteed if you land a 7 on your first pull.
- Grants rewards by entering different Random event tiles.
- Lost Items From the Old Capital
- Grants rewards by finding lost items around the zones, some of these items also contain lore such as the Memory Cards.
- Outpost Primer
- Grants rewards by completing specific challenges on a specific zone or meeting certain requirements. Once completed, you can also access lore from these records at the Research Log.
Outpost Research
Also known as Casper, he stands outside the tent at Scott Outpost, selling goods that reset monthly on two different tabs: Outpost Logistics and Association Supplies. Both offer similar supplies but most importantly Boopons, Master Tape and Tuning Calibrator for your Drive Disc tuning.
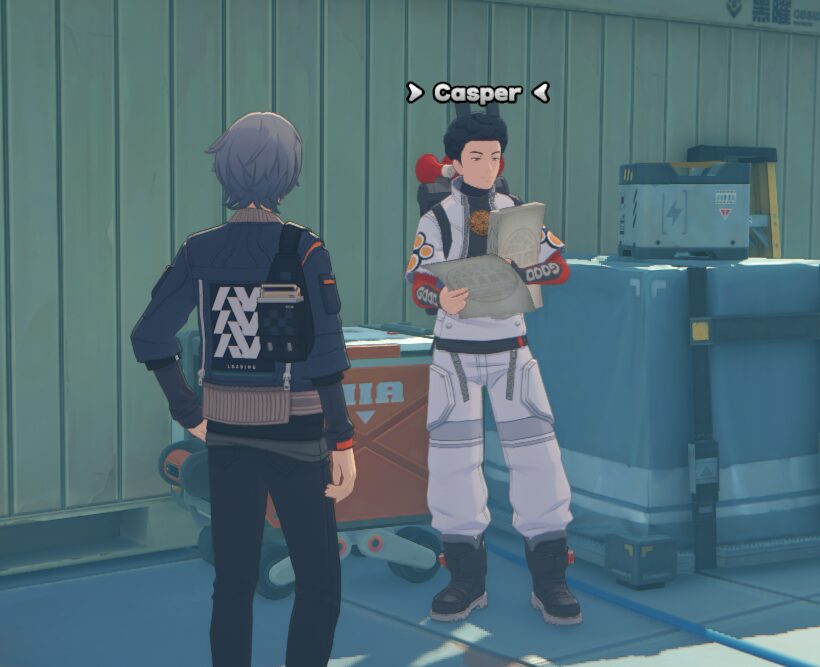
Each of these tabs use a different currency: Z-merits and Investigation Merits.
- Z-merits come from Hollow Zero floor completions in S-rank and Bounty Commissions. This currency is farmable by completing floors at any zone up to a cap.
- Investigation Merits come from Notorious Hunts as a weekly reward from doing challenges and Shiyu Defense, a beat-em up game mode where you set up 2 teams to fight waves of monsters consecutively. After clearing the first 10 fights at the Stable Node, you can fight in Critical Nodes which resets every few weeks, resetting rewards as well.
If you need helping building characters for this game mode or Shiyu Defense, please check our agent build guides!